A week ago, I made a Reddit post asking explorers at what point they usually drop off their loot. Since a few people had questions about the loot I posted in general and drug sites AKA chemical labs specifically, I’m making this brief guide. This’ll cover nullsec drug production facilities, such as H-PA Crew Crash Production Facility. The lowsec versions are pretty lousy and LS exploration isn’t good in general. Specifically, I’ll cover how to cheese run these sites in a frigate.
The Basics
There are 8 null COSMOS regions in the game: Catch, Cloud Ring, Delve, Feythabolis, Fountain, Tenal, Vale of the Silent, and Wicked Creek. Predictably, these regions have null COSMOS agents, with each region’s agents being concentrated in a specific constellation with lore significance. Each null COSMOS region also has unique gas and other sites, such as combat relic sites. This guide will focus on drug production facilities.
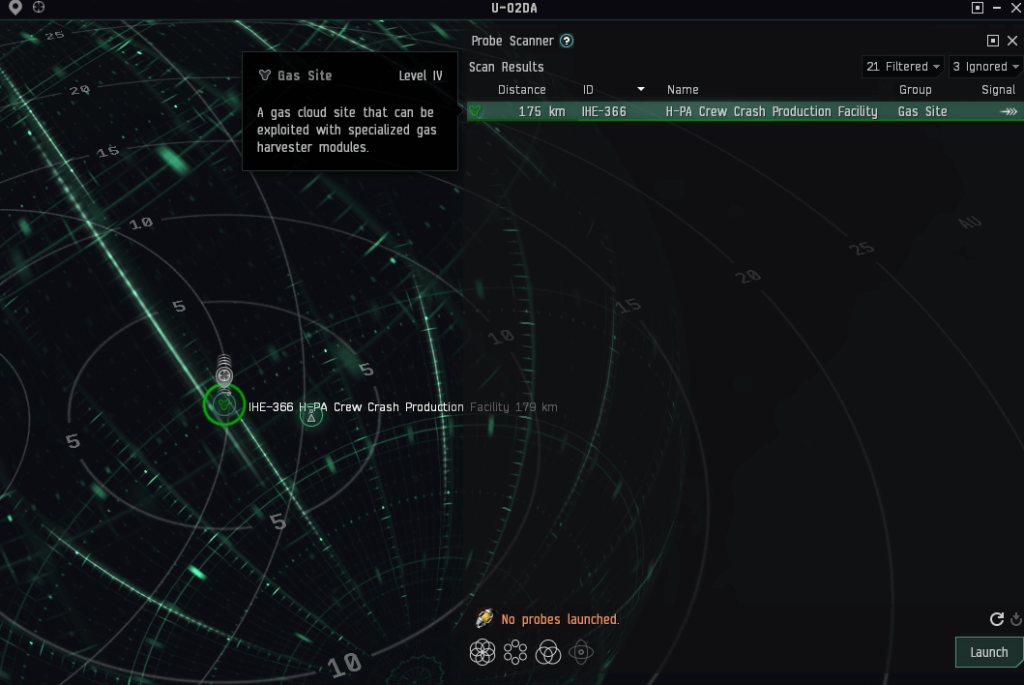
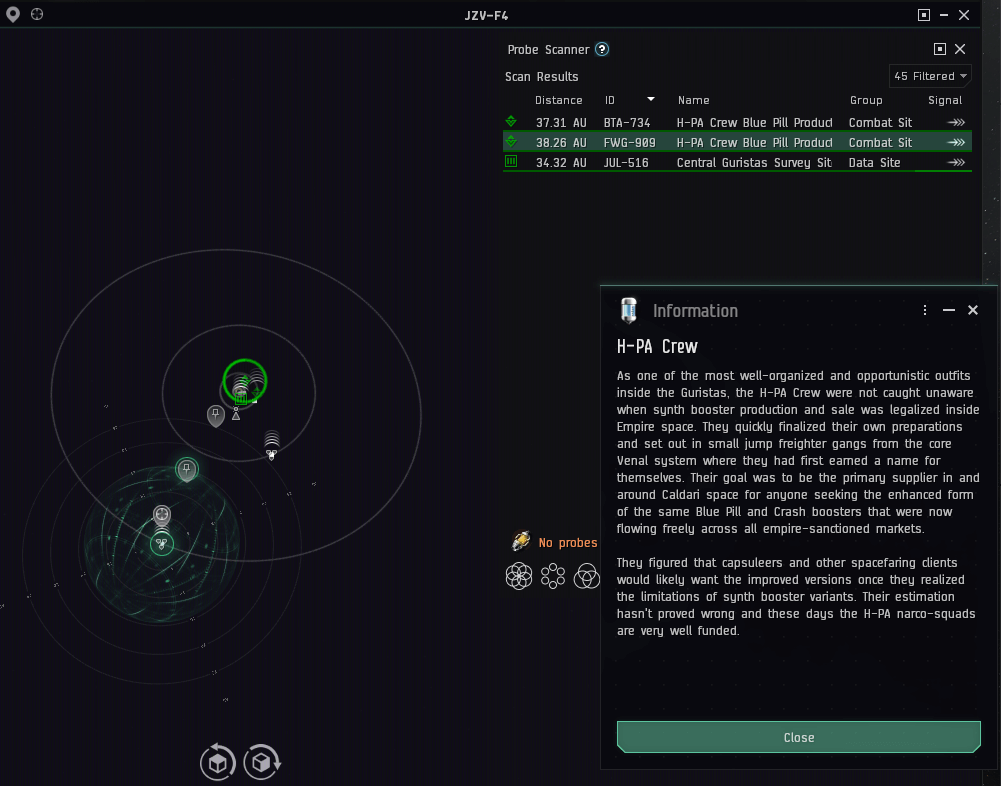
First thing’s first. These sites show as level 4 gas signatures in the probe scanner, with the exception of the H-PA Crew Blue Pill Production Facility in Vale of the Silent, which shows as a level 4 combat signature for some reason. The point is that you need to scan these sites down, and you need decent probe strength to do it. They’re also more rare than standard data/relic sites. Explorers exclusively running data/relic sites are also likely to miss them. Each of the 8 above regions has its own site, as follows:
| Region | Site Name | Rats | Booster |
| Catch | PDW-09FX Frentix Production Facility | Sansha | Frentix |
| Delve | CHAIN Mindflood Production Facility | Blood | Mindflood |
| Cloud Ring | Core Runner Drop Production Facility | Serpentis | Drop |
| Fountain | Core Runner Exile Production Facility | Serpentis | Exile |
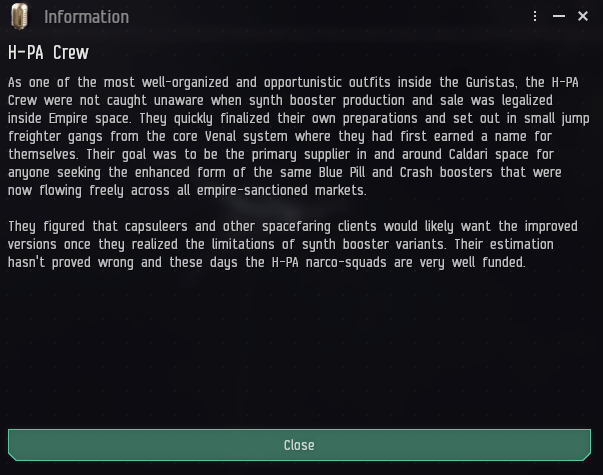
| Tenal | H-PA Crew Crash Production Facility | Guristas | Crash |
| Vale of the Silent | H-PA Crew Blue Pill Production Facility | Guristas | Blue Pill |
| Feythabolis | Elohim X-Instinct Production Facility | Angel | X-Instinct |
| Wicked Creek | Elohim Sooth Sayer Production Facility | Angel | Sooth Sayer |
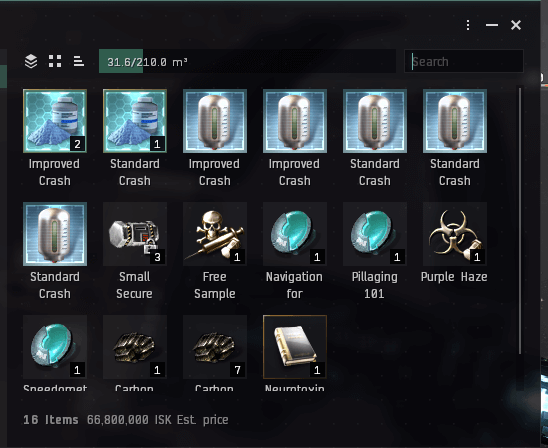
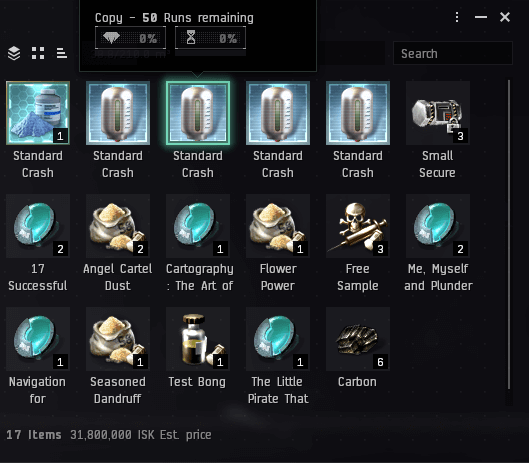
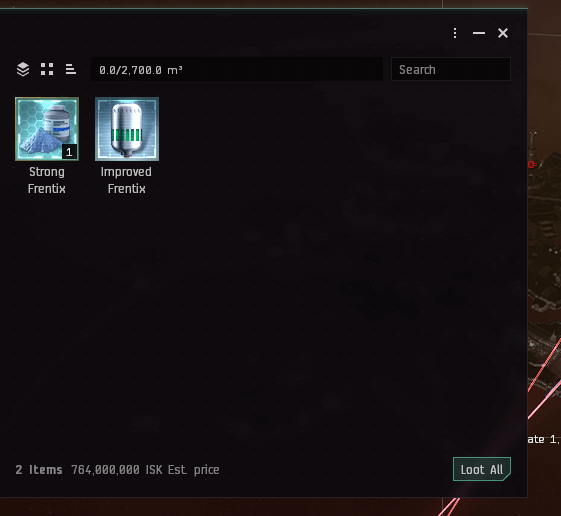
As you can see, each region’s site drops a different kind of booster. Specifically, the sites drop 50-run booster BPCs and reaction formulas for Standard, Improved, and Strong booster variants. They also drop drug-related skillbooks such as Neurotoxin Recovery and novelty lore items like Me, Myself and Plunder. The sites do not spawn outside of these regions.
The Sites
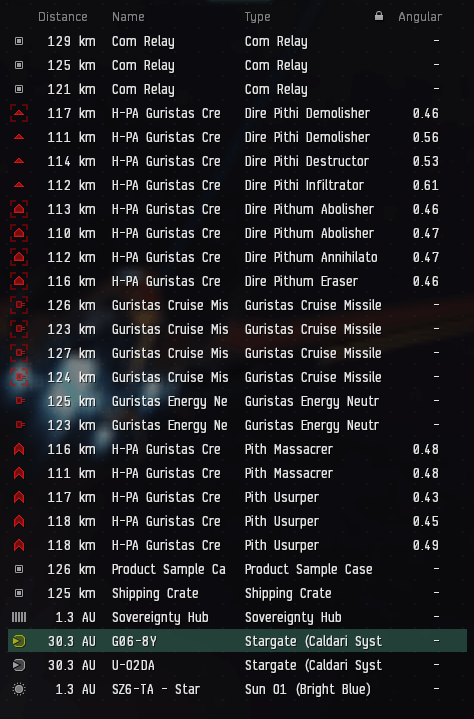
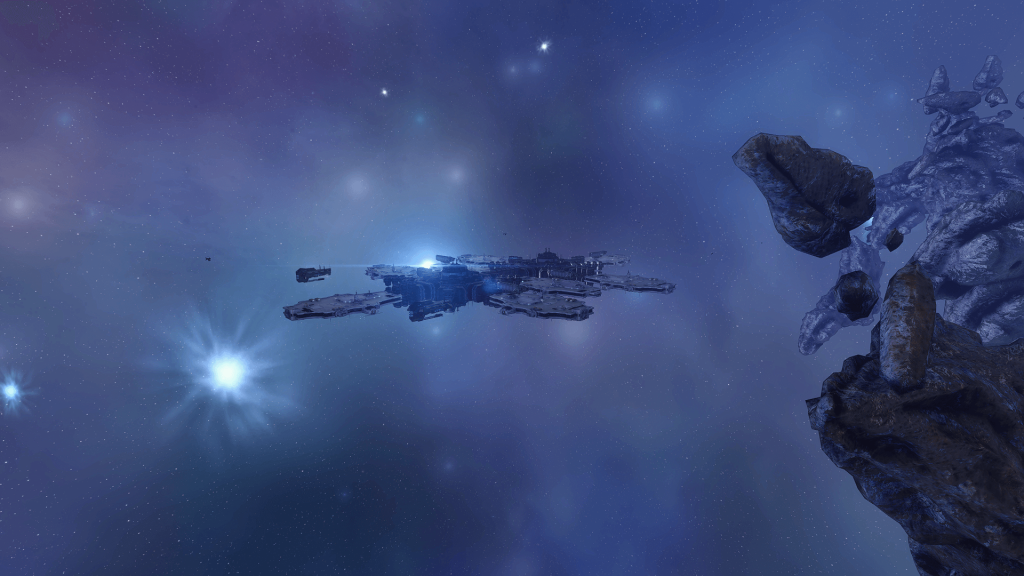
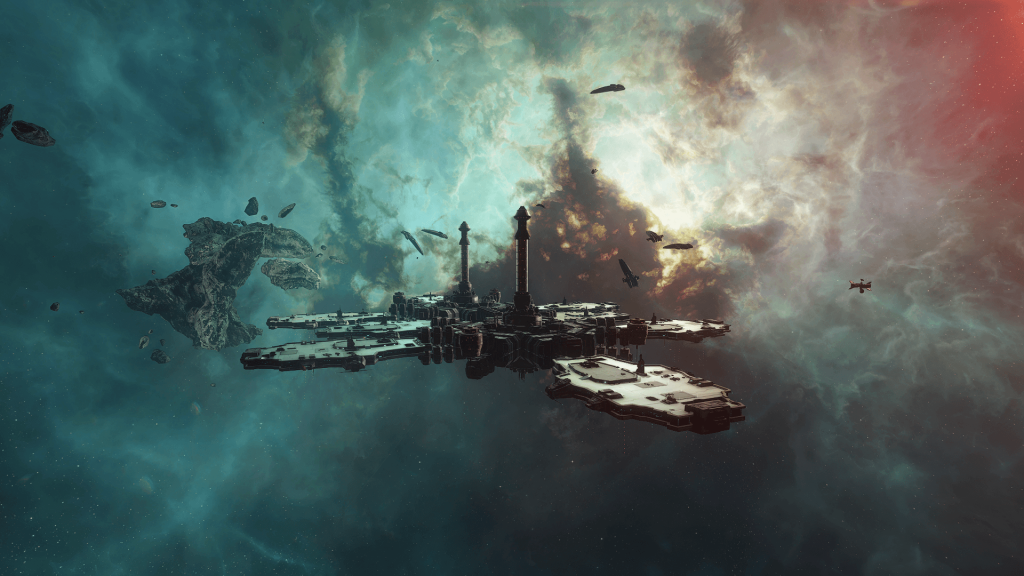
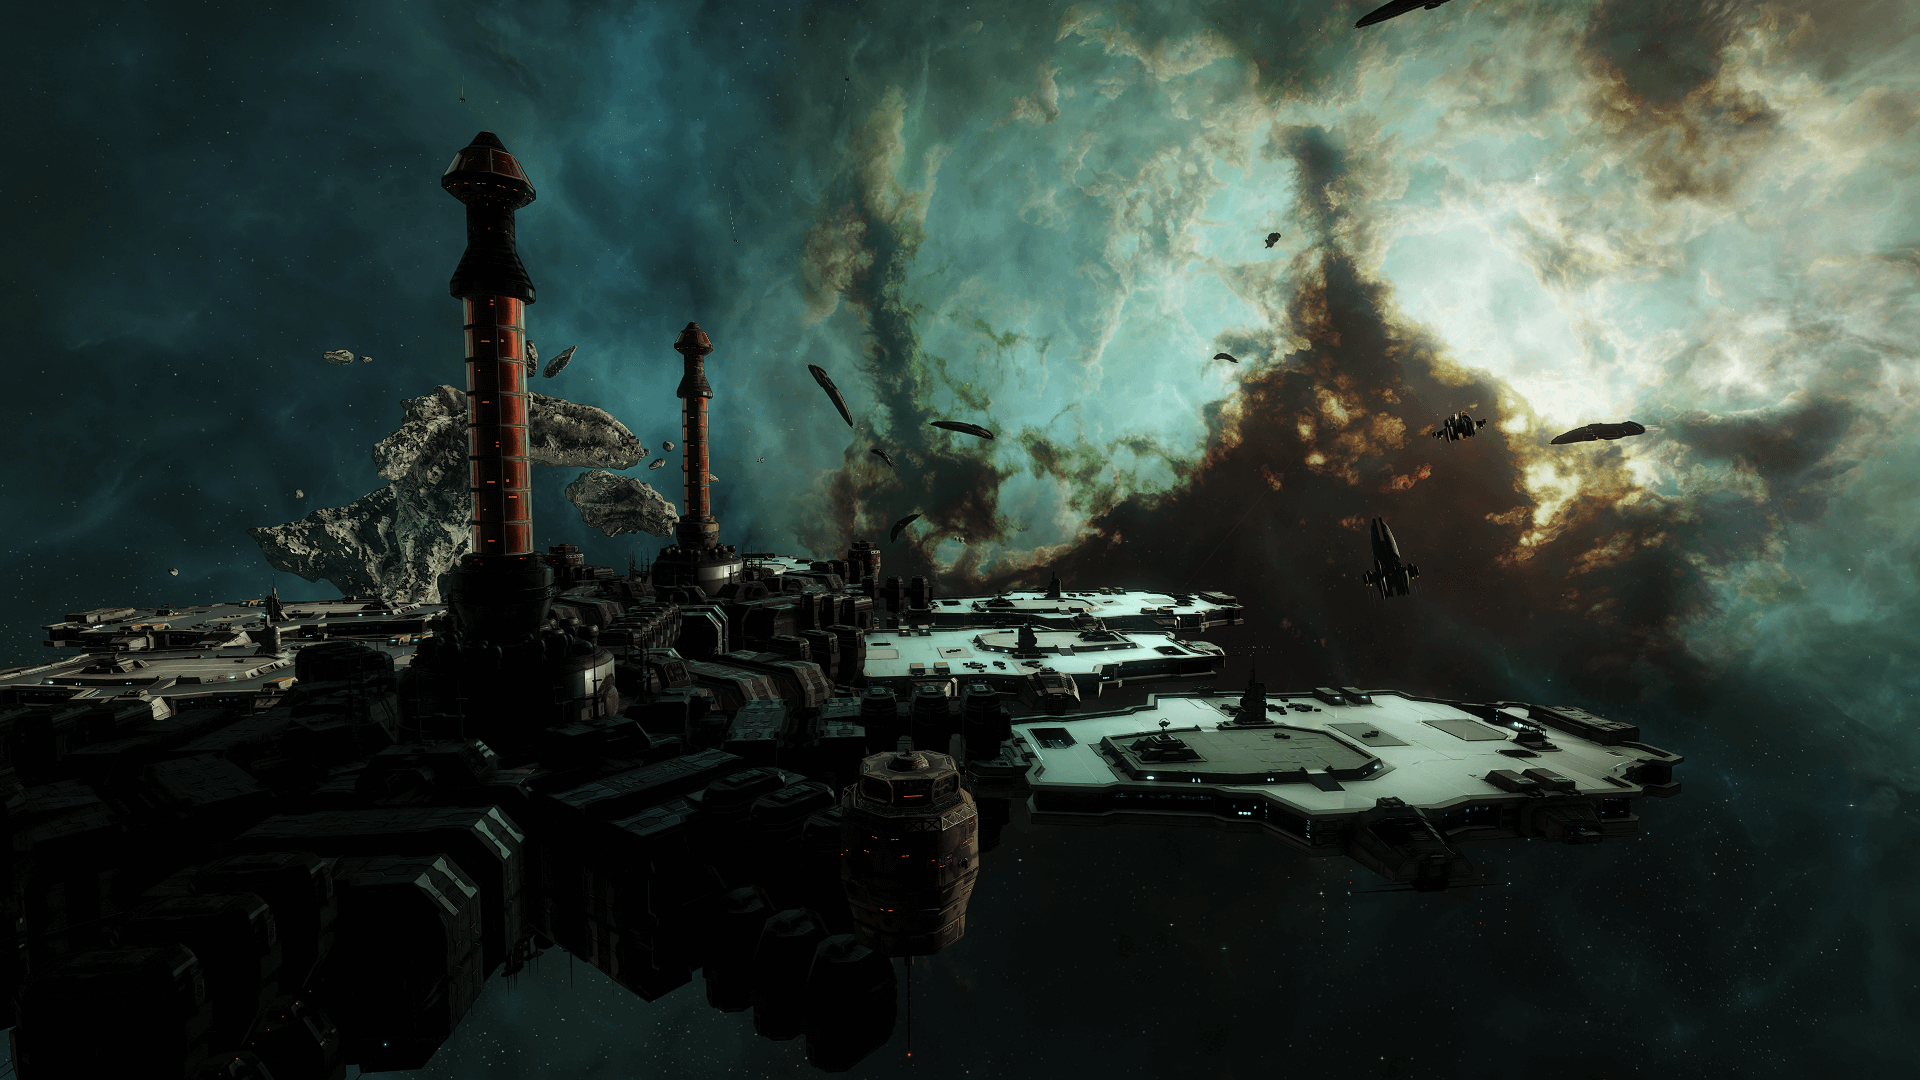
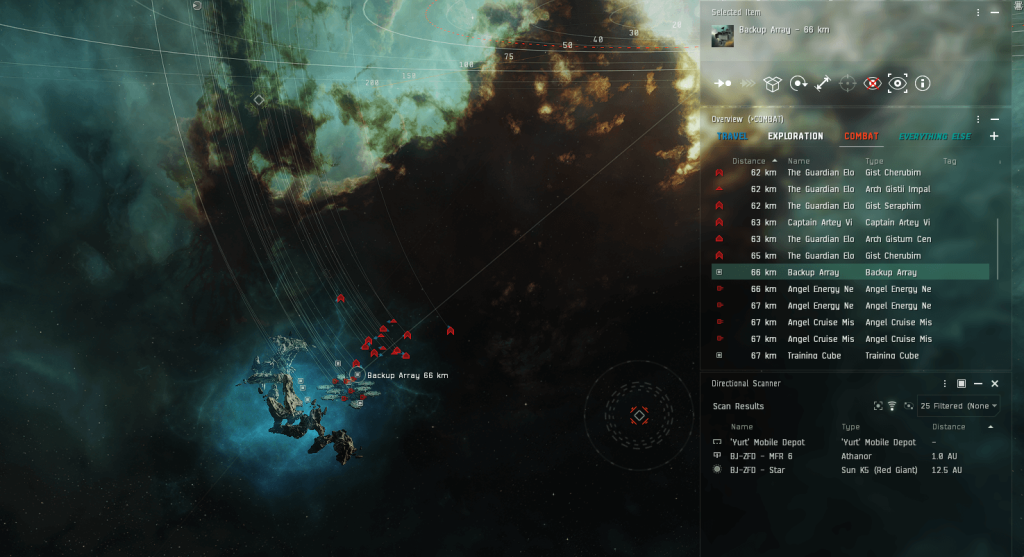
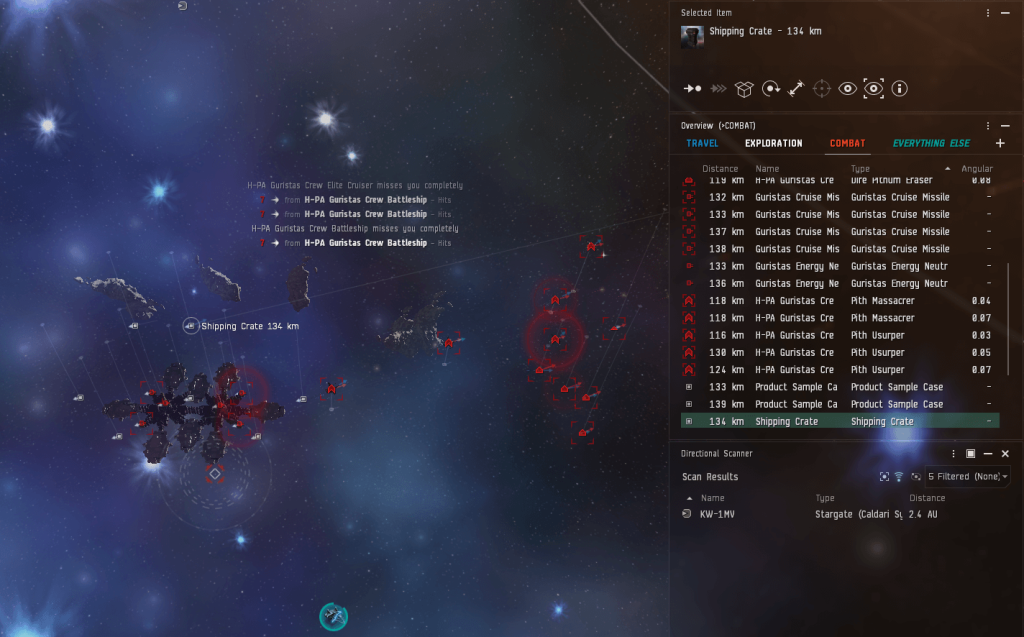
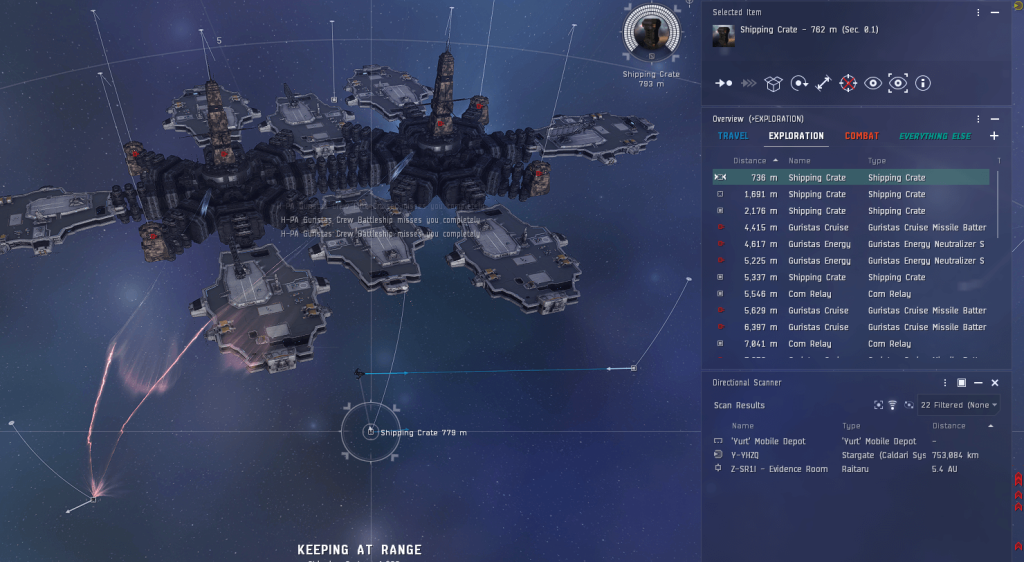
While they might have different rats and loot, each drug production facility’s layout is pretty much the same. There are 2 neuting towers and 4 cruise missile towers in the center of the site surrounded by cans. All the cans are data hacks. The site is guarded by a bunch of rats.
As you can see in the image, there are also 3 different types of cans in the site. Each drug production facility has 3 types of cans, though each type of site has different names for them. We’ll get to that shortly.
Oh, and don’t be alarmed at the rats and scary towers. You can hack all the cans in a frigate. We’ll also get to that shortly.
Here are some images of the physical site layout:
Cans and Loot
As mentioned, there are 3 different types of cans in each drug production facility, and each region’s version of the site has different names for them. I call the first kind of can basic, the second kind advanced, and the third kind comms.
| Region | Basic Can (70hp Green) | Advanced Can (90hp Red) | Comms Can (70hp Yellow) |
| Catch | Outbound Freight | Prototype Crate | Info Matrix |
| Delve | Component Bin | Science Lab | Training Cube |
| Cloud Ring | Victim’s Stash | Restricted Punch Bowl | Com Relay |
| Fountain | Test Crate | Think Tank | Info Matrix |
| Tenal | Shipping Crate | Product Sample Case | Com Relay |
| Vale of the Silent | Production Cache | Research Lab | Training Cube |
| Feythabolis | Demo Kit | Backup Array | Training Cube |
| Wicked Creek | Gadget Casket | Novelty Box | Com Relay |
There will always be 3 comms cans in a site: no more, no less. A fresh site will spawn with just 3 comms cans and nothing else until the first decloaked ship arrives in site. When that happens, the rest of the cans will spawn. That means if you’re in a covops, you’ll only see the 3 comms cans until you decloak in site provided the site hasn’t been touched yet. Interestingly, I’ve had additional cans spawn in an already-spawned site; not sure what’s going on there. A site will only ever have 3 comms cans, but can spawn up to 5 basic and 5 advanced cans. Or it can spawn none. It’s entirely up to RNG.
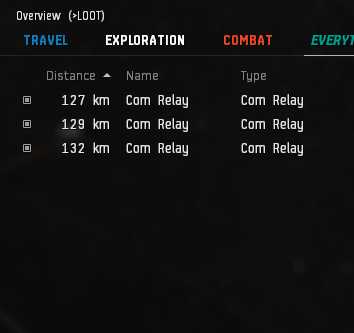
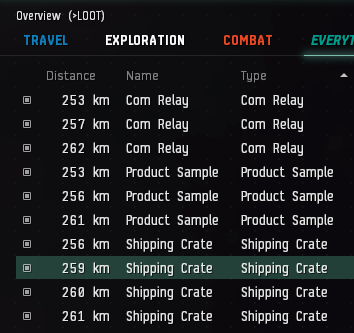
The 3 comms cans are in the same positions in every site along the main cargo pad structure. Advanced cans are scattered around the cargo pad while basic ones are a bit farther out. Each type of can also has a different difficulty, with basic cans having 70hp green cores, comms cans having 70hp yellow cores, and advanced cans having 90hp red cores. The different types of cans also have different loot, with comms cans dropping novelty items and skillbooks, basic cans dropping standard booster BPCs and reaction formulas, and advanced cans dropping improved and strong booster BPCs and reaction formulas. Or the cans can be empty. You can see some loot screenshots further up in this post.
Since every null COSMOS region only drops BPCs and formulas for a specific kind of booster, you can figure out which region will have the most profitable drops by using a tool like Fuzzwork. However, the sites are rare enough that I recommend sticking to Tenal, Vale, or Catch if you want to run them, since the relic sites there are so much better than in non-Guristas or Sansha regions.
Fits
While you can handily run these sites by taking a proper combat ship like a T3C and killing all the rats, there’s a way to do them in a frigate. You will be taking some damage and should kill 1 elite frigate for safety purposes, so I recommend an Astero or Pacifier. A T1/navy explo frig or a Metamorphosis will also work following the same principles. You can even make a covops frig work if you’re feeling brave.
Astero
[Astero, Nomad Drug Astero]

Multispectrum Energized Membrane II
Multispectrum Energized Membrane II
Drone Damage Amplifier II
Small Armor Repairer II

1MN Afterburner II
Data Analyzer II
Cargo Scanner II
Republic Fleet Small Cap Battery

Covert Ops Cloaking Device II
Sisters Core Probe Launcher, Sisters Core Scanner Probe

Small Gravity Capacitor Upgrade I
Small Hyperspatial Velocity Optimizer II
Small Hyperspatial Velocity Optimizer II


Caldari Navy Hornet x5
Hornet II x5
Hornet EC-300 x5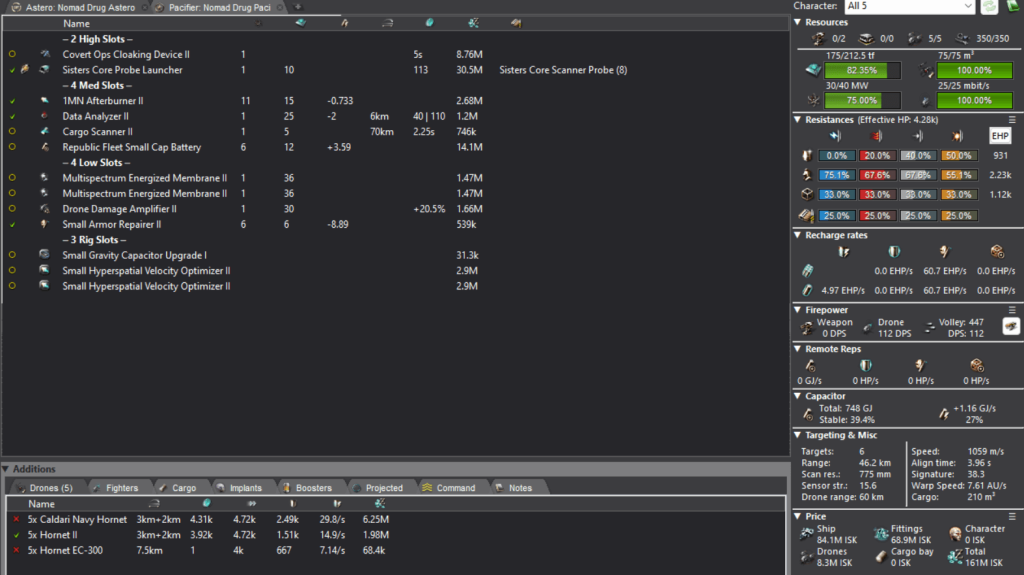
Pacifier
[Pacifier, Nomad Drug Paci]

Multispectrum Energized Membrane II
Multispectrum Energized Membrane II
Inertial Stabilizers II
Small Armor Repairer II

1MN Afterburner II
Data Analyzer II
Cargo Scanner II
Republic Fleet Small Cap Battery

Covert Ops Cloaking Device II
Small Focused Pulse Laser II, Imperial Navy Multifrequency S
Small Focused Pulse Laser II, Imperial Navy Multifrequency S
Small Focused Pulse Laser II, Imperial Navy Multifrequency S
Small Focused Pulse Laser II, Imperial Navy Multifrequency S

Small Gravity Capacitor Upgrade II
Small Hyperspatial Velocity Optimizer II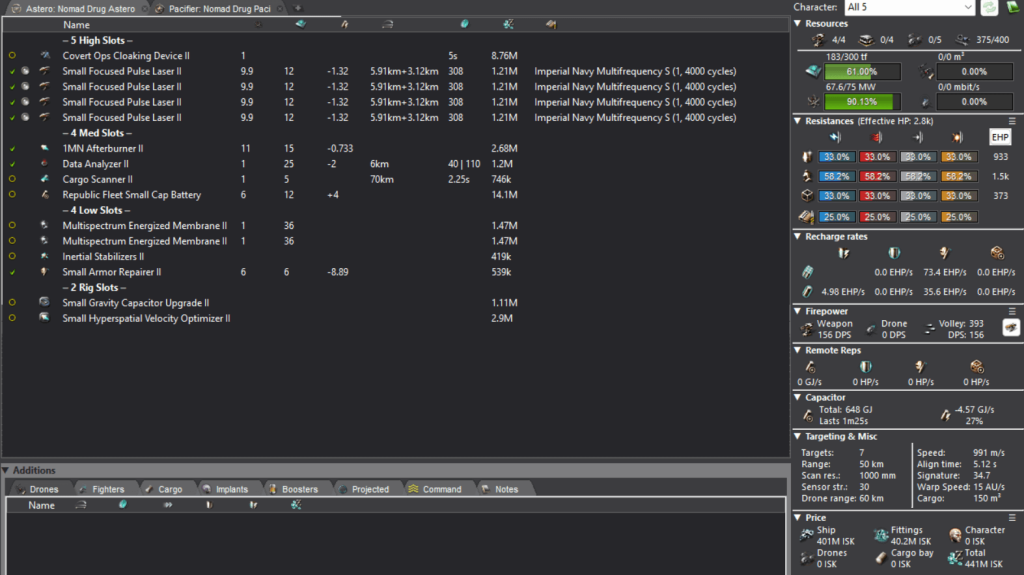
Obviously, you should have your general exploration fit stashed in a mobile depot somewhere at a safe. Armor is easier than shield because it leaves your mids free for important stuff like an analyzer. I highly recommend using a cargo scanner, since cans in these sites can be empty. Feel free to upgrade or downgrade the modules, use a zeugma, use different rigs, etc. All you really need is an analyzer, a bit of tank, a prop mod, some way to do damage, and ideally a cap battery for the neuting towers. Even an Astero or covops frig with just a medium shield extender would work, though it’ll of course be less comfortable.
You can of course replace your tank modules and weapons/drones with rat-specific ones, though that isn’t really necessary.
How to Run These Sites
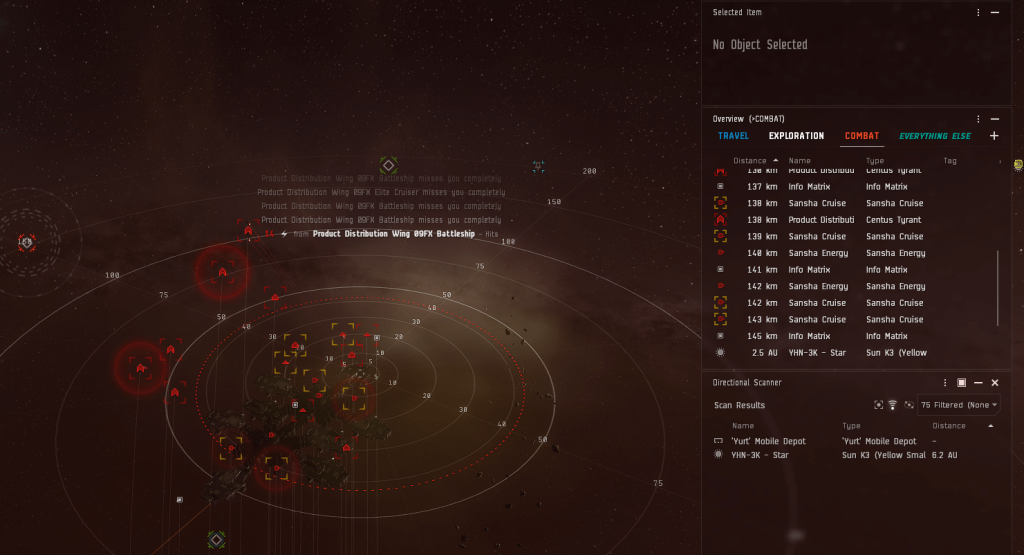
Now, for actually running the sites. You want to warp to the site at 100km and get rat aggro. Once one rat redboxes you, the rest will quickly follow suit. Then start burning away. The goal is to drag the rats away from the cans. Due to your small size and range, the rats will barely apply any damage to you.
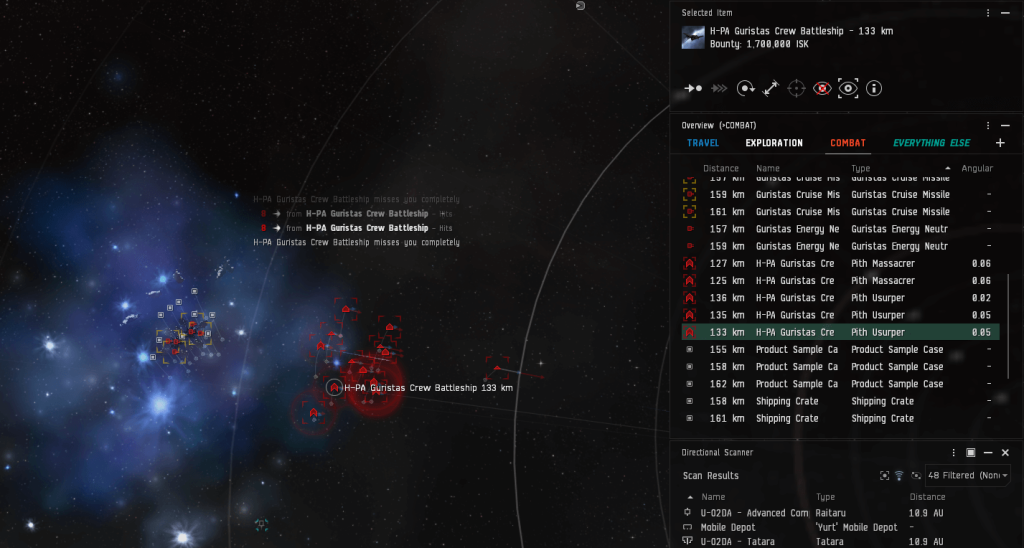
As you can see in the above image, all the rats are following my Pacifier. However, 1 elite frigate is pulling ahead of the pack. There will always be an elite frigate, in the case of this Tenal site a Dire Pithi Invader or Dire Pithi Infiltrator, that has a different name and is significantly faster than the others. This frigate will typically respawn in the center of the site when you warp back to hack the cans after pulling the rats away, since it’s much faster than the others and will therefore get far enough away from the cans to trigger a respawn. The distance for this is around 200km. One measly frigate wouldn’t normally be a problem, except…

Yeah. It tackles you. Sometimes. When it feels like it. These sites are janky. However, it’s still a good idea to kill it; just imagine being stuck in the middle of the site in your blingy Pacifier. That’s why you need some kind of damage-dealing capability on your ship. Don’t bother wasting time killing the other rats in your frig.
After you’ve killed the speedy elite frigate and the rats are comfortably far away from the cans (I like to get the battleships 70-80km out), make a perch bookmark and warp back to a can to begin hacking. A Zeugma/Blackglass combo will really pull its weight here. Cargo scanning the cans is also a good idea, both to avoid wasting time on empty cans and for another reason.
After you warp back into the site and start hacking, you’ll start getting neuted by the towers and shot by the cruise missile sentries. This isn’t a big deal, since the cruise missiles and rats can barely apply damage to you and you’ll regen enough cap to warp out between neuting cycles. A cap battery does help make things a bit easier, though. Just hack a can (ideally a basic one to start), warp to your perch, warp to another can, and repeat. If you’re using a cargo scanner, you can create a fleet for yourself and tag the good cans.
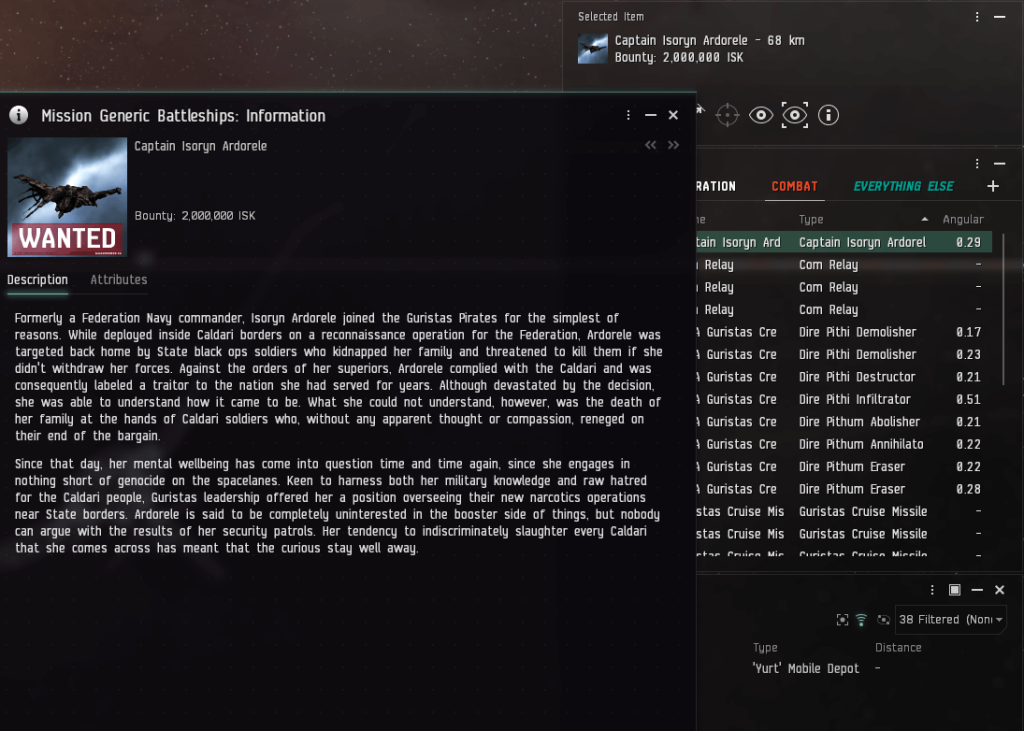
Lieutenants and Captains
Sometimes, there will be a special rat in these sites with a unique name that starts with “Lieutenant” or “Captain.” A lieutenant will be a frigate or cruiser and a captain will be a battleship. These rats have improved damage and tank and higher bounties, but most importantly are much faster than their regular counterparts, to the point where they can easily keep up with the aforementioned elite frigate. This means that they’ll also respawn in the middle of the site along with the elite frigate. You can take care of the lieutenant frigate in your Astero or what have you, but you pretty much need a proper combat ship to deal with the cruiser and battleship. I don’t recommend running the site in a frigate if a cruiser or battleship lieutenant/captain spawns. They have a chance to drop booster BPCs if you kill them, though.
Each region’s kind of drug production facility has its own frig, cruiser, and battleship lieutenant/captain that can spawn. I’m not going to list them all here since there’s nothing really unique about them aside from being fast. It’s not like officer hunting where a specific one can neut out your carrier and another can be cracked in a Drake. They do have interesting lore in their descriptions, though, which I highly recommend reading.
The Weird Stuff
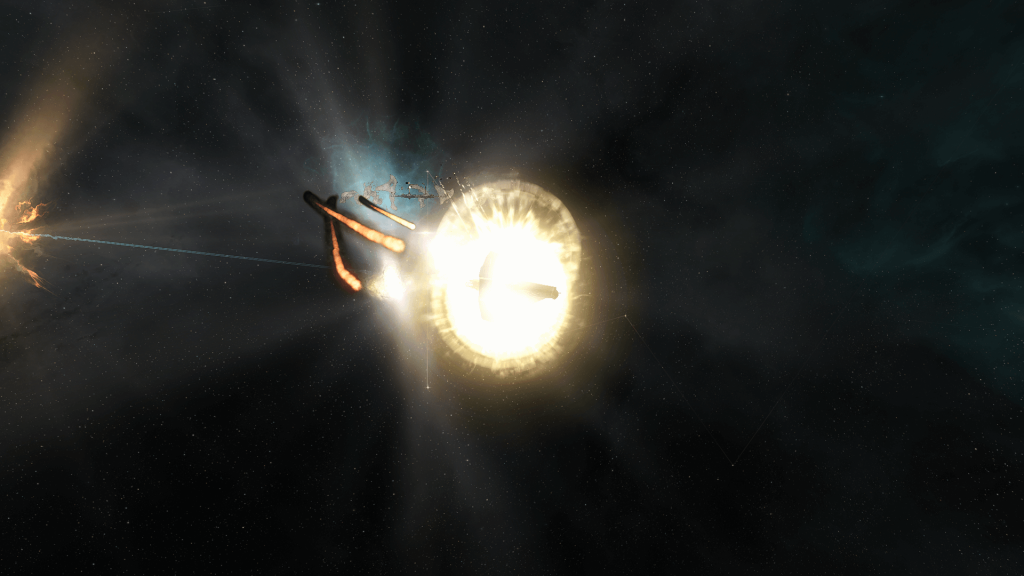
The jank doesn’t end with the speedy elite frigate sometimes tackling you. Oh boy, it doesn’t. These sites are like Superior Sleeper Cache archive rooms in that the sentries are bugged. In an archive room, warping out will cause the turrets to randomly shoot junk around the site and never target you again. Something similar happens with drug production facilities:
Yeah, what you see here is the neuting towers breaking and neuting a hacked can instead of my Astero. The neuting towers will consistently switch to neuting a hacked can if you warp out when they’re targeting you. The missile sentries sometimes break too (you can see they aren’t even targeting me in the image either). The sites have been like this for a very long time. It doesn’t change much on our end except making it easier to burn between cans instead of pinging back and forth off a perch, but it’s still really weird. CCPls.
Another weird thing about these sites is that they won’t despawn if partially hacked, sometimes even if fully completed. Instead, they’ll refresh at downtime with new loot, much like drone data escalations. This means you can hack only the good cans and come back the next day for new loot.
The Bottom Line
There’s not much to say here except that these sites are fun, unique, and can drop very valuable loot, even if they’re quite a bit janky. A strong booster BPC or reaction formula can easily sell for hundreds of millions of ISK. They’re also ignored by a lot of explorers because they’re poorly documented, show as gas signatures (or combat in Vale), and require more effort to run than typical pirate data/relic sites. I will note that the fits and tactics I outlined here are pretty conservative (you can use a covops with a medium shield extender if you really want), and obviously don’t apply if you’re in something like a Proteus (just kill the rats).
Because I think these sites are fun, I like to explore in Tenal, Vale of the Silent, or Catch due to them having these sites alongside valuable Guristas or Sansha relic sites. Just for fun, here’s a loot screenshot from an evening exploring in Tenal (with a short stop in Cobalt Edge to finish a drone data escalation):
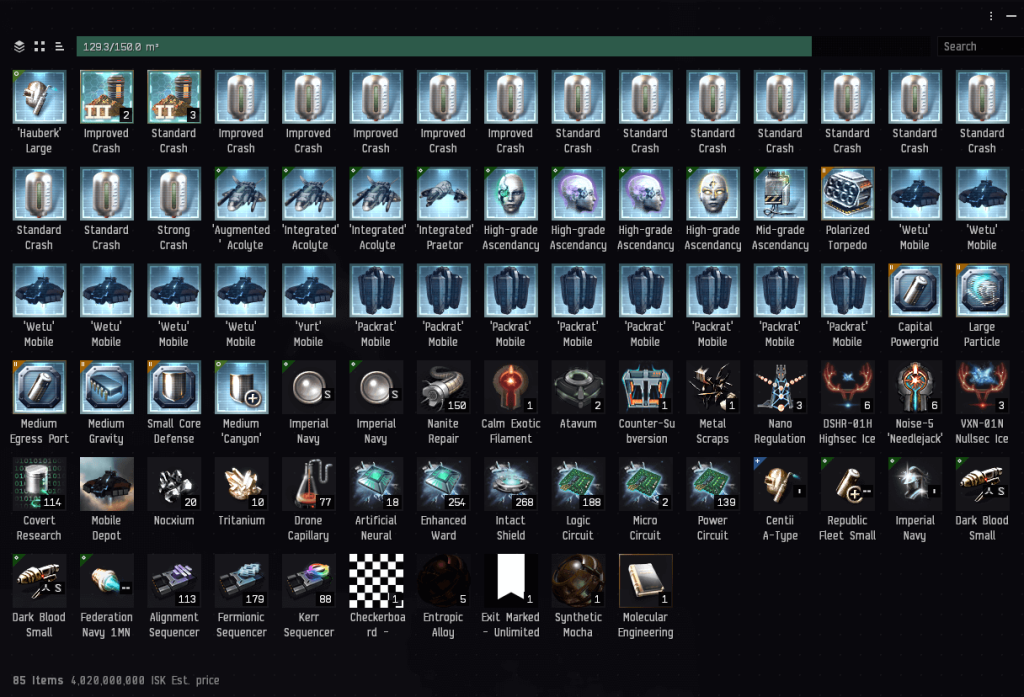
Gallery